
Every Operating System is kept pretty tolerant against invariably all known issues but still there are times when Windows gets crashed, sometimes with little but unfamiliar reasons.
It’s always a wise thing to have periodic backups of the precious data and create a recovery drive. Owing to this if your PC ever experiences any critical issue such as hardware failure, you’ll be able to use the recovery drive to reinstall Windows 10.
As a pre-requisite to this you’ll need a USB drive that has at least 16 Giga bytes space. Make sure to use an empty USB drive because this process will remove any existing data from the USB drive.
To create a recovery drive in Windows 10 follow these simple steps:
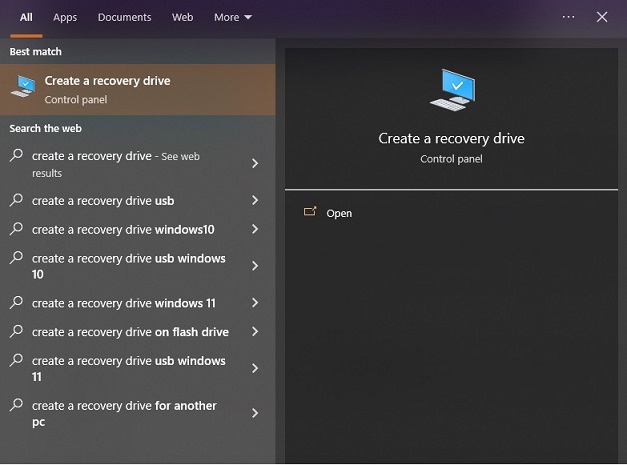
- In the Search box next to the Start button, search for “Create a recovery drive” and then select it from the Start menu.
- When the Recovery Drive tool opens, make sure “Back up system files to the recovery drive” checkbox is checked.
- Select Next.
- Connect a USB drive to your PC, select it, and select Next again.
- Select Create.
It will start copying all necessary files to the recovery USB drive. Let the process take its time and get the job done. When finished, unplug the recovery drive and keep it to a safe place to use on a disastrous situation.
If that situation occurs, you need to boot your PC from the USB drive.
- Plug the USB drive and you may need to interrupt startup by pressing some Function key on the keyboard, typically F8 key to open the ROM BIOS setup Utility.
- From there select the USB drive, and it should proceed to boot from the recovery drive.
- Further, you’ll be offered to either do a fresh installation of Windows, which will erase all existing installation before starting a clean installation.
- The second option, labeled as Advanced options, lets you fix your Windows installation in one of many ways. Choose the appropriate option.
In addition, there are many robust third-party solutions which are pretty simple to use and accompany so many other security and utility features. One of such is this one.